Showing posts with label Everything Else. Show all posts

FREE PRINTABLE: Family Love Boxes

1.08.2013

I made these love box templates last year for my LDS-themed blog and thought I would share them here for you as well. These can be used at any time, or make them around Valentine's Day and spread some Valentine's love throughout your family! These could easily be used for pre-school classes or other teaching opportunities.

CLICK HERE to download BOY, GIRL or BLANK box templates.


white cardstock
coloring tools (optional)
scissors
glue stick or scotch tape
pen


1. Print a box for each family member.
2. Cut out box and love coins.
3. Cut out slot in box lid and add family member's name in the space provided.
4. Use tape or glue stick to construct boxes.
5. On each day choose a family member to highlight and place their box in a prominent place with coins and a pen nearby. Instruct each family member to write something they love about that family member on a coin and place it in the box.
6. At dinner, open the box and read the love coins.
7. Highlight a different family member the next day and repeat steps until each family member has been highlighted.


Tooth Fairy Tiny Letter & Pillow

11.20.2012


It finally happened.  After weeks of twisting, turning, pushing and pulling Ella' very first loose tooth, it finally came out!  Here's the full report. 
 
About two weeks ago Ella (my almost 8year old) let us know her tooth was loose.  Ever day after that she pulled, tugged, wiggled and moved it. To no avail.  It would not come out.  I noticed a new tooth behind it, trying to find a space to come in so we needed the old tooth out. I pulled. She pulled. Daddy pulled.  We gave her apples and caramel to eat. No lost tooth. 
 
Even so, I prepared.  On Nov 15th I went with my girlfriends to see the final Twilight movie. We arrived an hour early, so I took a bag filled with supplies and made Ella' a tooth fairy pillow to hold the tooth once it decided to finally let go.  
 
( img src )
 I found this super-cute pattern on the Wild Olive blog to make a tiny version.  I printed it, scanned it, enlarged it and took it with me to the theater. I embroidered the cute little face and added a pocket with an embroidered heart to the back (completed photos later in post)
 
 
It was hurting poor Ella every time she tried to eat regular food.  This week I found this letter to the tooth fairy in her room: 
 
"Dear Tooth Fairy, My tooth has been hurting. Can you fix it or make it come out please? I have a pillow and the pocket with the tooth in it is in the back of the pillow". 
 
Finally, last night I saw that this poor tooth was hanging on by a thread.  I asked Ella if I could wiggle it. She said sure and came over, dutifully opening her mouth.  I reached in and popped it out!  No pain, no tears no blood.  She was SO happy!  She hung her pillow on the end of her bed and went to sleep.
 
 
After she went to bed I started working. I hopped on the computer and made a tiny envelope, including stamp, postmark, dates and address.  I put the Tooth Fairy's return address as "Land of Enchantment" only to be told later by my best friend, Emily, that "Land of Enchantment" is the New Mexico state motto!  I typed a tiny letter from the Tooth Fairy (using this free font).
 
 
 I got a bunch of white glitter (having already explained to Ella that the Tooth Fairy uses kids' teeth which she collects to make fairy dust) and poured it into the folded letter before slipping it into the envelope.  I sealed it up, grabbed a crisp $5 bill (we only give $5 for the FIRST tooth, $1 for subsequent teeth) and headed upstairs.  I poured the glitter around her room and into the pocket that held the letter and money.  She slept on...undisturbed. 


  This morning at 5:45 am there were squeals of delight from upstairs.  Ella and Evangeline raced down, filled with excitement to rehearse the morning's discoveries.  Ella remarked, "Mom! Now I know the Tooth Fairy is real because you never could have made such a tiny letter and stamp!" 
 
Ummm...does she not know me at all?


It was delightful to see the magic and wonder of childhood and faith and believing!


Upcycled Gift Card Holder

12.16.2011


Sometimes you think of something and you know, right away, that it. is. genius. This was one of those ideas. Last month before Thanksgiving my husband and I did Phase One of the South Beach Diet of which these low calorie cheeses are a staple. We bought a box of every variety, leaving me with 6 empty boxes when we were done. I saved them...for what? I wasn't sure.

Then in late November we had the Ahern family Christmas gift drawing and our family drew my niece and nephew ages 12 and 10 whose Christmas wishes were for iTunes gift cards. Then, it hit me! Here are the finished boxes. They turned out even cuter than I had imagined. Love this project.


- laughing cow cheese box (with cheese removed...ick)
- 1 piece of double sided 12x12" patterned paper OR 
2 pieces coordinating one-sided patterned papers
- paper trimmer
- glue stick
- scissors & pencil (not pictured) OR circle cutter


1. Carefully peel off box top label and side labels.


You can leave the box bottom label on. It is adhered MUCH more permanently and will be too difficult to remove.


 2. Cut 3 strips of paper using your paper trimmer.  Each strip should be this wide.  Now exactly what is that measurement? I dunno. Halfway between 1/4 and 1/2 inches.  6/16ths of an inch...maybe?


3. Next you make the top and bottom circles in one of three ways.
A. Trace your lid and eyeball while cutting to make the circle 1/4" less all the way around.


B. Cut a circle using a circle cutter. The circumference is 4" across.
C. Find something that is 4" across and trace that.  The bottom of my Lysol cleaning wipes was perfect...


Now you should have three strips and two circles.


4. Run glue stick well over back of narrow strip. Slowly glue it around circumference of box, covering where the label used to be.  You'll notice a small gap (the 12" paper doesn't quite reach around). 


5. Cut one of the other strips to 2&1/2 inches long. Glue this piece over the gap, matching patterns as best as you can. (But seriously, don't stress if it's not perfect. No biggie!)  Repeat with bottom of box.


6. Use glue stick to adhere circle of patterned paper to the top and bottom of the box.


7. Embellish with cut paper, scrapbooking supplies, chipboard letters, flowers, etc.  Then put your gift card inside (nestled in tissue paper if you want).


Here's one I made for my 12 year old nephew.  I kept it very minimal and masculine.


I hope you like this easy and eco-friendly way of re-using cheese boxes and dressing up gift cards this holiday season (and all year long!)

Printable: Summer of Fun Kit

6.14.2011


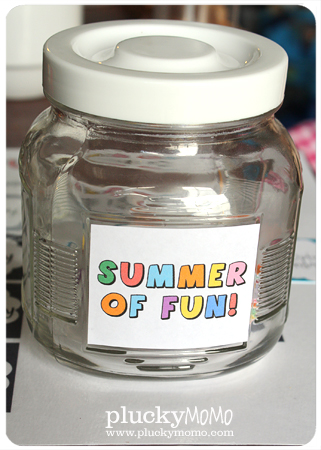
I worked on it all last weekend and I am finally finished!
I am thrilled to share with you our family's
SUMMER OF FUN Kit.


- downloaded Summer Fun kit
- laminater (optional)
- dry erase marker (optional)
- tape
- jar or other container
- scissors or paper trimmer
- pen

1. Print all pages.  I printed onto lightweight card stock, but you can print onto regular paper if you want to.
2. Cut out each of the 80 Activity Cards using a paper trimmer or scissors.  The cards are color coded into different categories as follows...


3.Use pen to fill in additional activities already scheduled or that your family enjoys on the blank Activity Cards provided labeled Wild Card.


4. Laminate calendar page. Use dry-erase marker to indicate the week.
5. Decorate jar (or other container).


6. Place cut Activity cards into jar.
7. On Sunday have children take turns drawing cards of different colors out of jar.

8. Use scotch tape to arrange Activity Cards onto your calendar next to the day your family will do that activity.


Don't miss tomorrow's post where I have a Free Printable of a Summer Journal so kids can record their madcap adventures during their Summer of Fun!

[ emilie ]

Tutorial: Silhouette Charm Bracelet

5.10.2011


Silhouettes are everywhere and they are only getting more and more popular. When I was seven years old my 2nd grade teacher made silhouettes of each child in class. I still have that construction paper silhouette of my chubby little face and long, braided hair. I love it. Silhouettes are timeless and classic. They preserve a memory of what a child's face is like when it is rounded by the softness of youth. They capture little baby curls that will someday be made straight with a flat iron and cowlicks which will soon be tamed.


- 1 sheet black shrink plastic (available via Amazon here).
- craft knife
- cutting matt
- small hole punch
- parchment paper/silpat & cookie sheet
- chain link bracelet
- jewelry jump rings


1. Take a photo of your subject from a 90* angle. For my wiggly toddler, it helped me to have a visual fixed point to instruct her to look at while I snapped 3-4 photos. You want to take them from slightly different angles to make sure you get that perfect 90* shot.


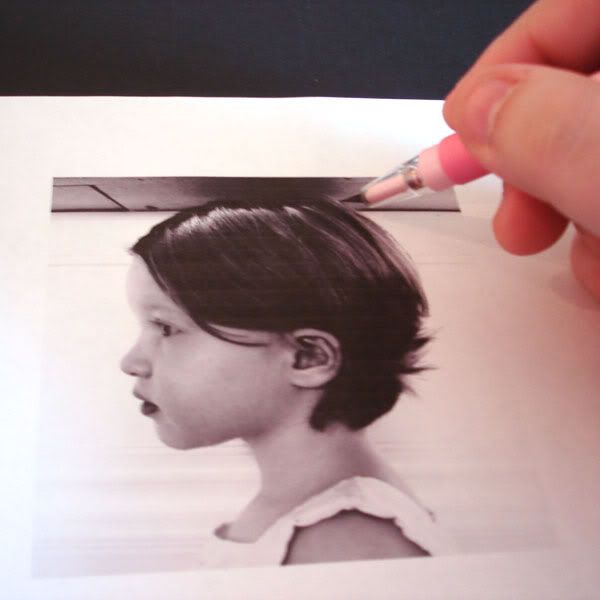
2. Change to black and white and crop photo so that the top of head to bottom is 2".


3. Print picture out on regular white printer paper, not card stock.


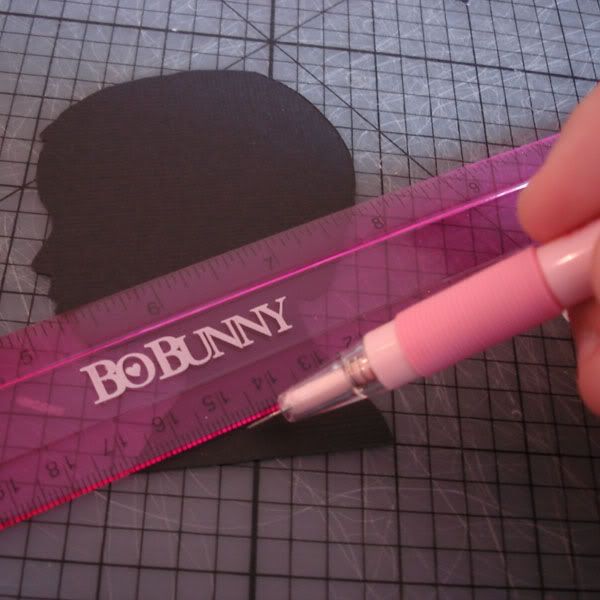
(NOTE: the following photos are from a time I made a silhouette that was large sized. Just pretend that I am working on a 2" silhouette)

4. Cut a 3 inch border around edge of silhouette and use scotch tape to affix on top of a piece of black shrink plastic.

5. With a cutting mat beneath, use a fine tipped craft knife to cut around the silhouette edge. Make sure to keep the craft knife straight up and down and to press firmly enough to go through the layer of paper and the layer of shrink plastic.


6. Use a ruler to cut an angle from nape of neck to top of chest if desired.


7. Use a small 1/8" hole punch (available at craft stores) to make a hole in the top of the head about 1/4 inch from the edge.


8. Preheat oven per shrink plastic instructions and prepare a baking sheet by lining it with parchment paper or a sil-pat.  Do not skip this step and bake right on a baking sheet...the shrink plastic will stick and create a warped finished product.

9. Place shrink plastic on sheet and bake per directions.  Plastic will curl up and then begin to flatten.  Have a flat bottomed object handy right next to the stove.  I used a paper plate.


10.  When plastic is mostly flattened remove sheet from oven and immediately use float bottomed object to completely flatten silhouettes by applying firm pressure straight down onto shrink plastic.


11. Remove from baking sheet, add small jump ring through punched hole and attach ring to charm bracelet.


You're finished!  That was easy, right?!