


I'm a major thrifty crafter. So I live for a thrifty crafter's paradise...Goodwill. There I found a Men's lined blazer for $3, but it was marked down half price to $1.50. Holla! Add some ribbon for $2.50 and you have a tweed back to school skirt that is preppy and ultra-cool. And all for a grand total of $4.00!


- mens lined blazer
- matching thread
- sharp sewing scissors
- hand sewing needle
- spool 1 inch wide washable ribbon in coordinating color
- iron
- 1/4" wide elastic
- measuring tape

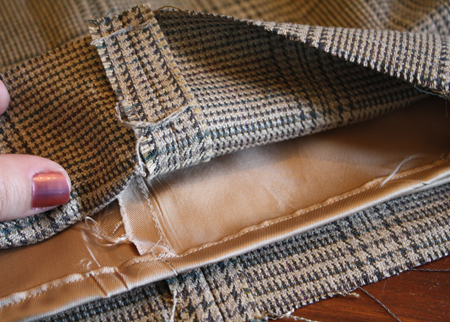
1. Carefully cut lining from coat. Cut back panel of coat at seams. Fold top to bottom the long way. This is your main piece of fabric.

2. Use measuring tape to take two measurement. (1) Your child's waist (right below belly-button) and (2) from their waist to the bottom of their knee. You will use these measurements to make the pattern for the skirt.

- Take your waist measurement. from all the way around. Add 3.5" to that measurement for seams and a little room.
- Divide that measurement in half since we are making a front panel and a back panel. That becomes your top measurement.
- Add 3 inches to that measurement to create an A-line effect. This becomes your bottom measurement.

3. Cut pattern pieces from tweed and then follow the same steps to cut pieces from silky coat lining.
4. Sew 5/8" seams down each side of tweed and repeat step with silky lining.


5. Turn your skirt right side out, but keep the lining inside out. Place lining in skirt and line up along top edge.
6. Change your machine settings to a very long straight stitch for basting.

7. Stitch along the top edge of skirt with a 1/4" seam. This will hold the skirt and lining together while you hem the skirt.

8. Next you'll work on the bottom hem.

9. Hem the silky lining of the skirt by ironing it 1/4 inch up and then folding it 1/4 inch above the ironed edge. Stitch to create hem.
10. Take your 1 inch ribbon. Fold it over and iron to keep closed. This will become a make-shift bias tape. Sew along bottom hem of skirt. (you may want to tuck lining far towards the top of the skirt so it doesn't get caught in the sewing). Repeat this step along top seam of skirt at waistline.

11. Use your iron to create pleats in your ribbon (at full width). Create an even number of pleats because we will be adding one more when we finish the ribbon detail and you want to end up with an odd number.

12. Pin your pleated ribbon to the bottom right edge of your skirt, starting 3 inches from your skirt's side seam. Measure 1 inch up from the bottom bias tape edge all the way around and pin in place.

13. When you reach all the way around, cut your ribbon so that there is 2 inches beyond where the unfinished ribbon edges should meet. Then create a pleat by folding the unfinished edge under, slightly overlapping the first pleat's raw edge.

14. Pin in place, covering both raw edges. Sew around top edge of ribbon. Repeat along bottom edge of ribbon.

15. Finish top of skirt by folding down skirt top (it was edged with folded over ribbon) 1 inch and sewing along edge, leaving 1 inch open. Run 1/4 inch elastic through. Close opening.
16. Remove buttons from jacket front. Use needle and thread to hand sew three buttons along front right bottom edge of skirt.

This was so easy to make. I ran back to Goodwill and snagged two more men's coats for even more Prep School Skirts. Now I'm off to buy some white knee socks and some brown leather mary-janes to complete the look!
WHO WOULD YOU MAKE A PREP SCHOOL SKIRT FOR?


6 comments:
WOW!! Wonderful project.. Thanks for sharing =)
I cannot believe you say this is easy. I couldn't make this in one thousand million years, because I can't sew a straight line. But dude, I ADORE that skirt. I wish there was a man's coat big enough to make me my own prep school skirt. I love the ribbon and the buttons the most. SO cute.
Oh my goodness, that is so cute! The little pleated ribbon and buttons are the perfect touch. Amazing work! i love it!
Rachel @ Maybe Matilda
This is so fabulous!! Congratulations on making it to the top 3!! I'd love for you to link up!
http://polkadotsonparade.blogspot.com/2011/05/welcome-to-party-im-so-excited-to-see.html
I'm back again :-) I loved this skirt so much, I featured it on my blog today! You can see it here: http://www.maybematilda.com/2011/05/five-favorites-521.html
Thanks for sharing this tutorial, and now that I've had some more time to look through more of your blog, I'm hooked! You've done some amazing things! I'm a new follower and so excited to see more!
Rachel @ Maybe Matilda
Cutest. Skirt. Ever.
Post a Comment