Showing posts with label Teacher Gifts. Show all posts

Holiday Teacher's Gifts 2013

12.20.2013

Yesterday the girls and I made teacher's gifts and sent them off to school with the girls today.  We made personalized etched plates with cookies on them.
 

It was super easy. The plate was $2.99 at Target. I used Contact Paper (cheaper than vinyl, better than sticker paper) and put it into my Cricut craft cutter. Each of the girls got to pick the font their teacher's name would be in. I have the renegade Cricut software that lets you cut any true-type font. Easy-peesy.
 

The swirls are part of the font called BERGAMOT ORNAMENTS. I laid the contact paper on the underneath of the plate and had the girls paint on Etching cream. Wait 20 minutes, rinse off...VOILA!
 
Next up were the cookies.  The girls helped me make a batch of Grandma Erekson's Molasses Cookies. They each measured some of the ingredients and dipped the cookie dough balls in the sugar before baking.
 

Then each girl wrote a note about the steps the took to make this gift for their teacher.  I loved seeing their little-girl, kooky, handwriting and I hope their teachers love it too!
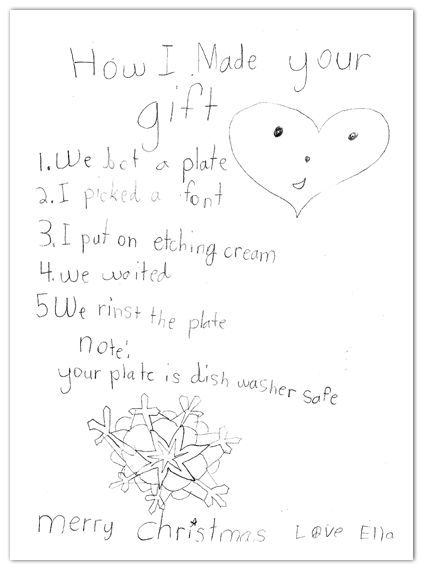
 

We wrapped the plates and cookies in cellophane, tied them with a glittery bow and added the card with the above photos, showing the girls making their gift.
 

Whew!  One more thing checked off the to-do list.

Next up: sewing Christmas pajamas for the kids, making Gingerbread houses, a holiday party, crafts, candy making for our Bishopric, etc, etc, etc....AGGGGGG!



Teacher Gift Printable FREEBIE!

6.11.2013

I have given a LOT of different Teacher Gifts over the years. From the Teacher's Clock to treats to hand lotions to books for their classroom.


This year my daughters wanted to give each of their teachers a flower (they are very girlie girls) so we found these beautiful lily bulbs in a pot that they could plant and enjoy. Of course, I had to whip up a gift tag to tie to the pot and, of course, I had to share it with YOU!


Tags are 3x4" and come two to a page.  Choose green or black and then simply print, cut out, hole punch and tie with a ribbon!


EASY handmade sugar scrub

2.20.2013


My girls and I had a Valentine's party this year for their favorite friends and their Mommies (who also happen to be MY favorite friends). We made favor bags for the little girl guests, but I also wanted to make a favor for the Moms. I whipped up this simple sugar scrub for hands as favors. My kids also mixed up their own batches for their school teachers. I saved one of the favors for me and I am IN LOVE! This made my hands so soft and it couldn't be easier.

 
4 oz. jelly jars with lids (or 4 oz baby food jars with lids)
one bottle liquid handsoap
white granulated sugar
food coloring (optional)
 
to decorate: twine, small tags, sticker paper, download of printable labels


1. In a small bowl pour 1/2 cup sugar.  Of course, you can make this in a much larger batch and then just divide it into the jars.  

2. Add 1 Tbsp. liquid hand soap.  Choose a soap that is the color you want to go along with your theme and which smells really good.  I used Dial Pomegranate and Tangerine.  I measured this once by counting the "pumps" it took to get 1 Tbsp. and then just pumped it without measuring there after.
 

 3. Mix well with a spoon.  It's going to feel too dry, but just keep mixing. You want a very tight scrub. If you add too much liquid soap it will separate while in the jar. Yuck.
 
 
4. If you want a deeper color to go with a party theme you may add a very small amount of gel food coloring. I used Wilton in mine.  I did test it and it in no way colors your skin. If you choose to deepen the color you want to make one large batch so the color matches in each jar.
 
 
5. Spoon by half-cup fulls into your jars.
 
6. Print sheet of labels (either pink or grey...please don't request custom colors...the grey will match with everything!) Cut around each circle. I free-handed it with scissors, but you can use a punch if you have one.
 
 7. Place labels on Top of lids and tie the rim with baker's twine (I like the twine made by Pick Your Plum best, but you have to wait for it to come up for sale). Thread small, white tag through the twine before tying the bow.  I wrote Thanks for Coming on my party favors and Handmade by and then had my children hand-write their names onto the tag when using for Teacher Gifts.
 
Hope you love this project!  It really couldn't be easier and the results are divine.  Click below to download the pdf of my label sheets.  For personal use only. Not for resale.
 
(This Google Doc is marked SHARE WITH ALL - You do NOT need to email for permission to download and print.)