Showing posts with label Craft With Kids. Show all posts
Designed: Ella's Invite
1.30.2014
My oldest daughter has a birthday coming up. She asked if we could collaborate together on the invite this year. So, Ella and I designed this invite for her upcoming birthday party
together. She choose to go to the
Franklin Institute in Philadelphia and just invite one friend to join us. Perfect!

FREEBIE: Back 2 School Binder Printables
9.09.2013
Maybe it's because I am currently 8 months pregnant, but I have the overwhelming urge to be more organized this school year. My daughters just started 3rd grade and 1st grade. I needed a system to keep their important papers, artwork and report cards, all in one place. I got the idea to make a School Year Binder for each. And since school supplies are still at good prices, this is a great time to set one up.
(1) 1 or 1&1/2 inch binder for each school child
(1) set of binder dividers with 5 tabs
10-20 plastic sleeves
hole punch (optional)
Downloaded binder inserts by Plucky Momo (download link below)
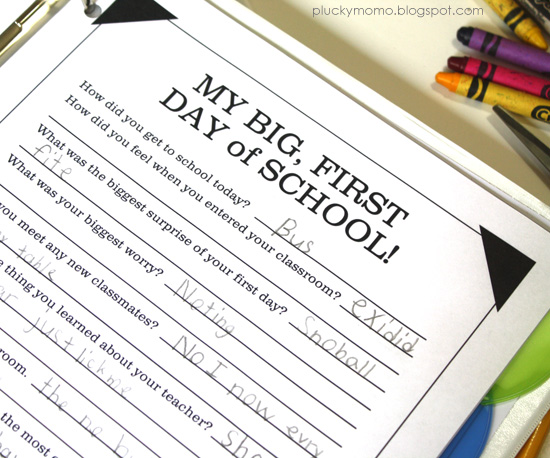
4. Have (or help) child fill out the questionnaire about their first day of school insert it into next page protector in binder OR hole punch the edges and add to binder.
5. Label 5 tabs as follows..
Great Grades: Put completed tests, homework and other projects which received great marks.
Awesome Awards: Certificates from school, grades, sports, etc go here.
Friends & Fun: I will put birthday party invites from school friends, notes from buddies, etc, here.
Report Cards: Place report cards and progress reports here.
Amazing Artwork: Artwork and coloring pages from school. Be sure to date each item on the back before you insert it into your plastic sleeves. If an art project is larger than 8.5x11", scan or take a photo of it and print it onto 8.5x11" paper.
6. Put these binders in a central place and put papers into them as soon as they return home. This will ensure you keep everything organized and in place. Add more page protectors as needed.


1. Print binder cover page onto un-textured cardstock. I buy mine from Wal*Mart and it's the perfect weight and super-cheap.
2. Fill out (or let child fill out) binder cover page. Slip into front of binder.
3. Print School Day Photo page, attach first day photo, and insert it into first page protector in binder OR hole punch the edges and add to binder.
2. Fill out (or let child fill out) binder cover page. Slip into front of binder.
3. Print School Day Photo page, attach first day photo, and insert it into first page protector in binder OR hole punch the edges and add to binder.
4. Have (or help) child fill out the questionnaire about their first day of school insert it into next page protector in binder OR hole punch the edges and add to binder.
5. Label 5 tabs as follows..
Great Grades: Put completed tests, homework and other projects which received great marks.
Awesome Awards: Certificates from school, grades, sports, etc go here.
Friends & Fun: I will put birthday party invites from school friends, notes from buddies, etc, here.
Report Cards: Place report cards and progress reports here.
Amazing Artwork: Artwork and coloring pages from school. Be sure to date each item on the back before you insert it into your plastic sleeves. If an art project is larger than 8.5x11", scan or take a photo of it and print it onto 8.5x11" paper.
(or customize categories to suit your needs).
6. Put these binders in a central place and put papers into them as soon as they return home. This will ensure you keep everything organized and in place. Add more page protectors as needed.
7. At the end of the school year take a photo and place it on the School Day Photo page. Have child fill out Last Day of School questionnaire. Then, flip through the book with your child in the first week of Summer and re-discover the wonderful school year they had!
USA Flag patriotic craft
11.06.2012
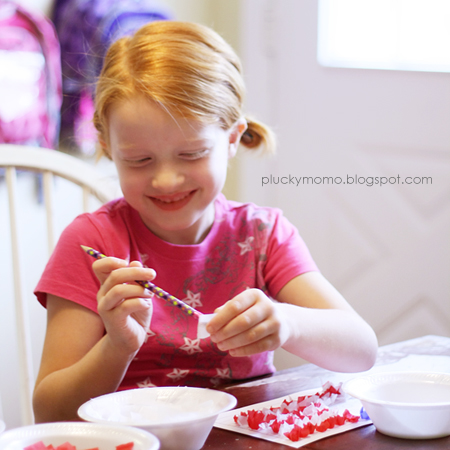
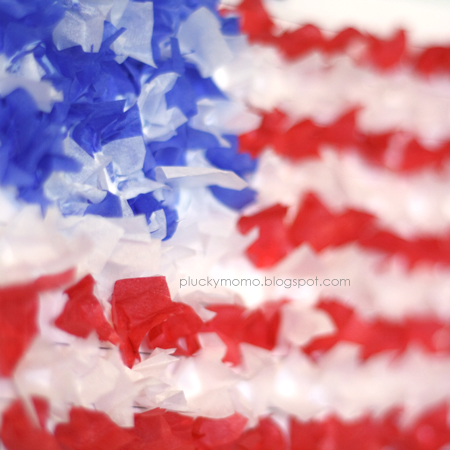
It's election day in the USA and all of Facebook, television and Instagram is filled with politics and persuasive rhetoric. I chose to use this day (when my kids are off school) to talk to them about the right to vote and it's blessings. We sat down together and did this patriotic craft. It was loads of fun.

- print out of American Flag craft page (click here to open printable pdf)

5. Take one piece of tissue paper and wrap it around pencil eraser, folding the sides around the pencil shaft.
7. Place pencil eraser onto picture, pressing lightly and pull pencil straight up.

Craft with Kids: Homemade Board Game
7.12.2011
I got this idea in my head when I was busy creating the Summer Of Fun kit. This is an easy, inexpensive way to have tons of fun and creativity with your kids. And it occupied my 6 and 4 year old for an entire Summer afternoon. Priceless.

1 white poster board (enough for two game boards)

2. Cut along fold to make 2 game boards.
3. Use your sharpie to freehand (or by tracing a bowl) create a small circle in one corner as the starting point.
4. Use the same method to create a larger circle in opposite corner as the finish point.
7. Ask child what they want their game to be called (themed). Ella chose "Flower Power" and Evangeline chose "Princess Palace". You may suggest some easy themes like "Fairy Forrest" or for boys "Pirate Point" or "Dinosaur Den". Yeah, I'm way into alliteration.
9. Have the kids start with markers (if they're old enough) and make bridges to jump someone forward in the game (ala Candyland)
10. Let the kids go wild with the crayons, stickers and markers. You may notice I put a small dot on a few squares and told my kids not to color those squares. These are for special squares where we wanted to write an instruction.
11. Help kids to write items on their action squares like "lose a turn" or move ahead 3 spaces". We chose to make ours follow the theme of the game. So in Ella's game where a flower princess is trying to return to her garden home one of the squares says "Bee Sting - lose a turn!" and she drew a bee next to it (again, ala Candyland).
And may I add that Evangeline had covered her board game (named Princess Palace) with Princes, Princesses and frogs and when I asked about a penalty square she chose a Vampire Lair where the blood gets sucked from you and you have to go back to the start. Genius and hilarious.
My kids ATE THIS UP! We played each game multiple times and it was so much fun. They loved landing on squares of their own creation and winning the game they created.
Have fun and HAPPY GAMING!
Tutorial: Make Your Own Butter in a Jar
6.27.2011
"With enough butter, anything is good.”
And I heartily agree.
Here's a simple and fun activity to do with kids this Summer. Kids really love seeing this process go from start to finish and the taste of the butter? Well, you just haven't lived until you have had butter this fresh. It's divine, people. Divine.
A quick note about the nickle in the jar. It acts as a churn, creating resistance with each shake. It is, indeed, optional. However, without it you are more than doubling your jar shaking time. And that's a lot when we're talking about 10 minutes verses 30 minutes when small kids are involved. You'll notice I boil and then wash the nickel. I feel like that's pretty darn clean, but you can always shake away without it if you are concerned.

- 1 small baby food jar for each child
- 1 nickle for each child (optional)
- heavy whipping cream
- salt
- thin kitchen towel/cheese cloth

1. Wash a small empty baby food jar out with soapy water. Rinse well and fill it halfway with warm water.- 1 nickle for each child (optional)
- heavy whipping cream
- salt
- thin kitchen towel/cheese cloth

2. Place nickle(s) into jar and microwave on high for 3 minutes. (the metal does not spark, not sure why, but it doesn't). Make sure water comes to a full boil and stays there for at least two minutes. Remove from microwave with oven mitts.
3. When cool enough to handle remove nickel and clean jar and nickel thoroughly with dish soap. Rinse well and dry with paper towels.
4. Fill each baby food jar about half way to the top with heavy cream, add a pinch of salt. Add nickel and put the lid on securely.
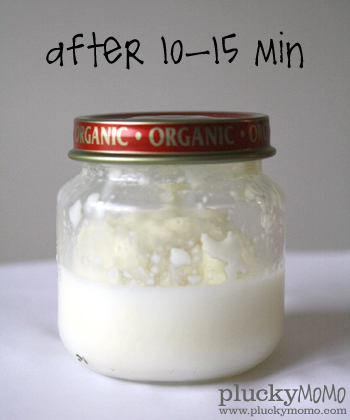
5. Shake the jar for about 5 to 10 minutes. Make sure the top is properly closed as it could leak. Around five minutes you should notice the cream coating the jar.
6. In about 5-10 more minutes you'll notice a large lump of butter has formed.
Here's the clump of butter solids in the center and watery liquid around the sides. Bonus: that watery liquid is pure, bonafied Buttermilk. Use it to make pancakes tomorrow morning.
7. Scoop the butter out of the jar with a butter knife, and place it inside a clean kitchen towel or cheesecloth. You may squeeze gently. This extracts all of the left over liquid and leaves you only with the solid butter.
9. Scrape from towel into a small dish. Place in fridge for 10-15 minutes to firm up if desired.
10. Spread onto toast or other bread item and enjoy!
Yield: One small baby jar filled half way makes a finished yield of about 1 Tablespoon of butter. You can have multiple family members participate with small jars if you want a higher yield or you may use a larger jar. You could use a pint canning jar, but add more nickles and more salt before shaking. Just always fill you vessel only half way full.
P.S. I did this with the girls with the larger size baby jars and it took the same amount of time. 10-15 minutes total.
P.P.S. Linking up to Skip to my Lou
[ emilie ]