


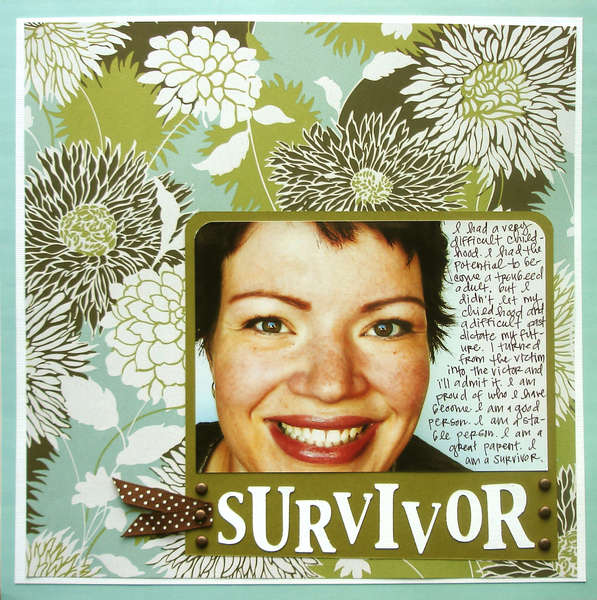
Tip #1 - Go Minimal
Let your bold patterned paper be the majority on your layout. Choose one of the colors from the pattern to add a small frame to a photo and then journal right on the photo. This is a great way to get a big impact from a print you love and still bring focus to your photo and journaling. This is one of my favorite layouts. I love the simplicity and I love this bold patterned paper.
Tip #2 - Cut it up
A craft Knife can be your best friend when working with large patterned papers. I love the Bo Bunny retractable craft knife for this job. Cut out certain large elements of your pattern and use them as a focal point for a coordinating paper from the same line with a smaller pattern. In this layout below I cut a large flower from the patterned paper that is along the top of my photos and used it to accent the smaller patterned paper from the same collection.

Tip #3 - Overlap Edges
You can also use your craft knife to just cut the edge of a large pattern out and overlap them over your photo. This is a great technique for making your photo look like a part of the overall layout and also creates the illusion of multiple layers without all of the effort. For this layout I cut the edges of the swirls in the pattern and laid them over the photos edges.

I hope that helps answer your question.
Go forth and create with bold, graphic and large patterns!


No comments:
Post a Comment