Suddenly I Need.....

3.30.2010

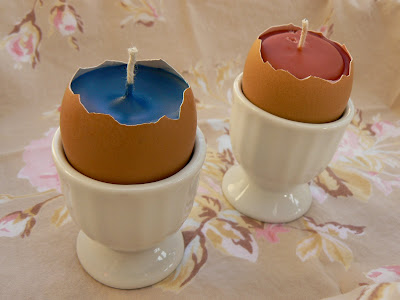
Egg cups.
Who knew?
I didn't even know until I saw this craft on the THE MAGIC ONIONS blog


ROCK STAR Birthday Party

3.27.2010

Alright! Here is the rundown of last weekend's joint Birthday Rock Star Party!

First, I should mention that we are not those people who invite everyone in our child's class. We allowed them to invite as many friends as the age they are turning. So, since this was combined and Ella is 5 and Evangeline is 3...we had 8 guests, including our children. I have always liked this method better than inviting a house filled with 30 kids and therefore...inviting chaos.

The Invites
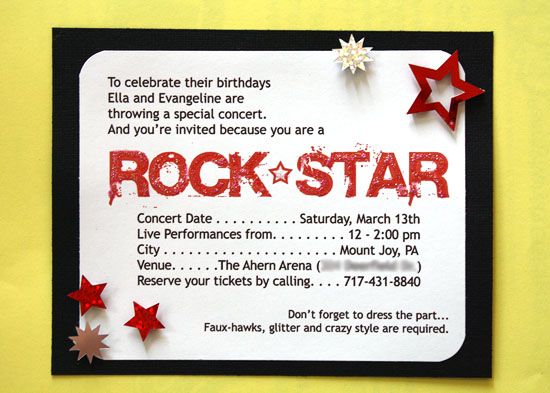
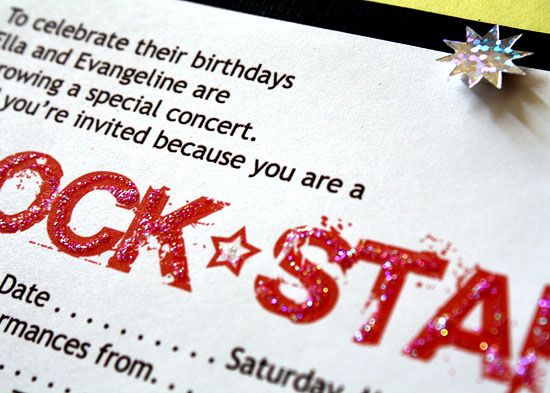
We made these half on the computer and half from paper. I designed the information and we printed it onto white cardstock. Then we Put it onto black cardstock, used dimensional foam dots to apply sparkly stars and other symbols and used Stickles to make the words ROCK STAR glittery.


The Set-Up
Our joint birthday presents for the girls was a stage for our play room. I thought up the basic plans and idea and Matt executed it perfectly. We used MDF and 2x6" underneath for support and height. We painted it black (and soon a large white star will be painted in the center). It fits into the corner of our room.

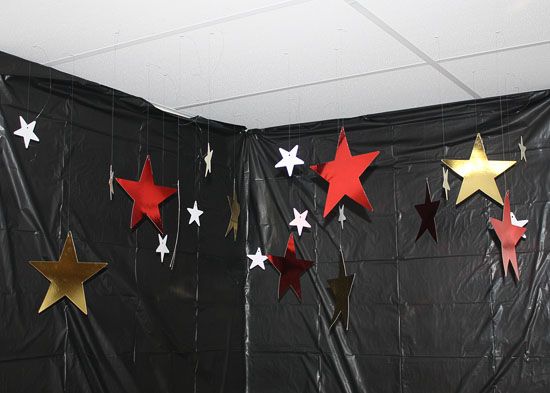
Then I purchased two rectangular plastic tablecloths at WalMart ($2/each) and hung them from the ceiling behind the stage. I also purchased large foil stars in red and gold and smaller foil stars in silver (also from the Party section of WalMart). I used fishing line and white thumbtacks to hang the stars above the stage.


We also purchased a package containing 8 pairs of Rock Star sunglasses in the WalMart party section for $2.00


The Backstage Passes
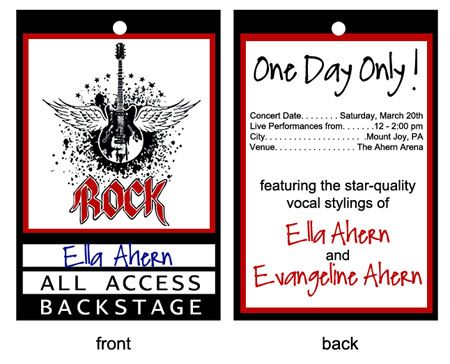
I designed these Backstage Passes for each guest, personalized with their name. Here is the front and the back.


When Guests arrived I met them at the door, wearing my backstage pass which said "TOUR MANAGER". I asked for each guest's name and checked my list to make sure they were VIP members. Then I gave each their backstage pass and let them choose a pair of the Rock Star sunglasses.

The Craft
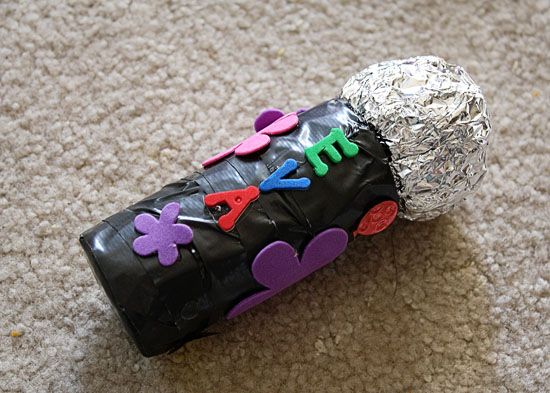
Once all of the guests arrived we sat down at our table and each guest got a microphone to personalize. I started with a toilet paper roll. I stuffed it with crumpled aluminum foil for stability. Then used black duct tape to tape across the bottom hole and then wound the black duct tape up the rest of the roll, going over the top edge. I folded the tape over the top edge. Then I made foil balls and hot-glued them to the top of each taped roll.


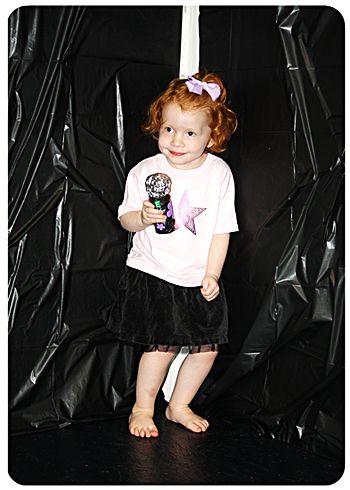
At the table I had an assortment of adhesive backed foam stars, shapes and letters. Each child wrote their name and then embellished their mic with stars and other foam shapes. Here's Evangeline holding her microphone.


The Activity
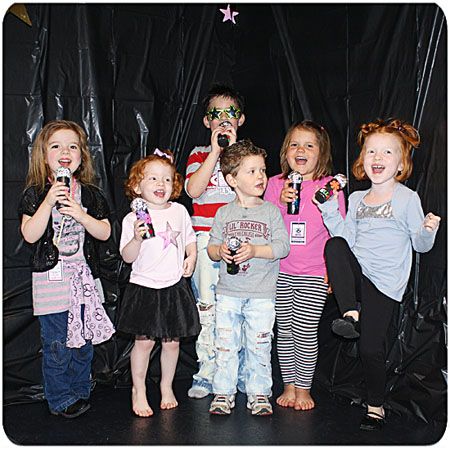
We headed downstairs to the Concert. We had the stage set up and had put out at least one instrument for each child if they wanted it. We had a tambourine, maracas, drums and small toy pianos. All of these things we already owned. I had made a mix CD of kid-friendly dance songs and we put the music on and let them dance, play and sing their hearts out. They LOVED it!


The Cake
I made a guitar shaped cake and decorated it as a hot pink electric guitar. I used a Wilton pan, but there is a template to cut a guitar from cake on the Family Fun website here.


The Favors
I'm not a big fan of the small gift bag of favors, so each child got to take home their microphone, backstage pass and rock star glasses as their favors. They seemed more than excited with those items. Here Jackson displays his sweet glasses, backstage pass and stellar drum moves.


It was a fantastic party. The kids were happy as clams and there wasn't too much work to do during the actual party time. Just some prep and then we let them go wild. It was our most successful party yet.

Friends, Family + Laughter

3.18.2010

These are the things that fill up our lives.
And there is a website which celebrates that.
With an amazing team of fifteen women (which includes Ali Edwards, Elsie Falnnigan and Emily Powers) you are sure to find inspiration every day.


I was recently asked to join this stellar team and my first article is up.
Many times people ask me "Do you sleep?" They can't imagine where I find time to do a variety of cratfy persuits and be a full time Mommy. Well, the answers are in my first contribution to the site.

Click here to read RECLAIMING YOUR TIME where I share three easy steps that have helped me to find time to do what I love.

And don't forget to browse the rest of the site. Articles include recipes, craft projects and tips in many different categories. You are sure to find something which inspires you today!

Craft Product Review: Purple Cows Laminator

3.17.2010

I have previously owned a laminator made by Purple Cows and was quite happy with it for quite a while. It was a hot laminator and came with a variety of pouch sizes. I used it SO OFTEN, much more than I would have anticipated upon first getting it. But then, after 2 faithful years I put something into the feed crooked and the thing got jammed...permanently.

I was so sad that my Laminator died that I hopped online to replace it and, what do you know, they have a new model with better features and an anti-jam button! Woot! And it laminates both hot and cold. Seems great! So I snatched one up and started in. Here was my experience with this product.

Our family holds a weekly devotional called Family Home Evening.
I made and laminated this chart with movable photos as assignments change.

Supplies Software: Adobe Photoshop CS2, Tool: Purple Cows Laminator on Medium Heat, Ribbon: Bo Bunny, Other: Adhesive backed velcro
 First off, it can't get much easier to use. You plug it in, select the temperature you want...either cold, warm or hot. A green light glows when it's heated and ready to go (in 5 minutes) and you feed items into the slot. I did not find anything particularly complicated about this machine. My 5 year old could probably use it (on the cold setting of course).

Here's something which is also cool. The old Hot Laminator which had just one feature, laminating, cost the same as the current model with its extra features and improvements. I am really impressed that Purple Cows made it better without make it more expensive.

I made and laminated this personalized luggage tag in no time using Photoshop and my laminator.

Supplies Software: Adobe Photoshop CS2, Tool:
Purple Cows Laminator on High Heat, Ribbon: American Crafts

I laminated four different items with this laminator. I tried the cold setting, which had a few air bubbles. I am not really sure what one would use this setting for, unless it was to laminate old documents that were possibly heat sensitive. I tried the warm setting, which is recommended for one to layers of paper. It also turned out fine, with just a few air gaps around the edges of the paper. I ran it through again and those edges sealed. I also laminated thicker items with the hottest setting. This setting produced no air pockets.

It is NOT recommended that you use this product on items thicker than 1 cm. And I would probably say even less than that. I tried three layers of mid-weight cardstock and got a lot of air gaps.

Because we live far from family, I cook our Thanksgiving Dinner each year. I printed our favorite holiday recipes, organized them by which recipe should be started first (the Turkey) and laminated the entire thing. This way I don't have to dig through a recipe book and I can spill stuff on the recipes and then wipe clean.

Supplies Cardstock: WorldWin DoubleMates, Software: Adobe Photoshop CS2,
Tool: Purple Cows Laminator on High Heat, Other: clip art, binder ring


What I liked:

- I liked the convenience of having a laminator at home. I ended up using it a surprising number of times for various projects and home crafts.

- It is sleek and not too bulky, lightweight and portable if needed.

- I especially like the new features. They really improved this from the last version.

- The price is pretty good. I think for the amount of use I have gotten from this machine, how durable it seems and the additional features that $60 is pretty darn reasonable. Also, these are hitting JoAnns stores in your area as we speak and I am sure you could probably use a 40% off coupon to make it really affordable.

- I could really see myself using this a lot. This weekend my daughters are having a joint birthday party with a ROCK STAR theme and I am creating and laminating a back stage pass for each guest. It's so convenient to do it at home with so much else to plan.


What I disliked:

- There were some air pockets in nearly every project I made. This was easily solved by sending through the machine again, but should you have to?

- As with ALL laminators, some of my projects got a slight bow in them as they came out of the laminator feed. I sent them through again, upside down and that solved the problem. Maybe this is wishful thinking, but I kind of wish they had included a sort of extender arm, like those that catch paper coming out of your printer. If they had one on the front and one on the back which could be retracted, it would solve the slight curling problem, but I think that may be asking a bit much from such a small and home use laminator.

- This product could have MUCH better instructions in the manual that comes with it. As previously stated, it IS very easy to operate, but I tried pushing the release button a few times (which is supposed to fix jams) and it didn't seem to be doing anything. I wasn't sure if that should be pushed while the machine is running or after you turn it off. They also don't give clear recommendation on which heat settings to use for which types of projects. This can be figured out based on experience and I will probably just rock the hottest setting every time.


Where and How Much
Product Name: 13" Hot and Cold Laminator
Manufacturer: Purple Cows
MSRP: $59.95
Currently only available at: purplecows.net or in JoAnns stores (I recently saw this at my local JoAnns in the clearance section for $19.99....go get one people...for real.

Okay, so I have not been a huge fan of all Purple Cows products in the past, so you know I am being straight with you, I really love my laminator. I have used it quite a bit, I love the convenience, the pouches come in a good variety of sizes and are reasonably priced and it works pretty well. I would definitely recommend it to a friend and have already recommended it to a Kindergarten Teacher friend of mine.

What do YOU think? Can you see yourself using a laminator very often? Do you think the price is reasonable?

Behold, The Laminator!!!

Yes, that could be the Action Movie title of what I did last night until 3:24 AM.
But look at just ONE of the cute projects I busted out for my article today on The Scrap Review.

I made and laminated this personalized luggage tag in
no time using Photoshop and my laminator.

Supplies Software: Adobe Photoshop CS2, Tool:
Purple Cows Laminator on High Heat, Ribbon: American Crafts


Wanna see what else I made and read the full review?
Click here!

Saturday Spotlight: Cool Things from Japan

3.13.2010

Japan seems magical.
Based on their textiles, craft items and art.
I got a package from Japan once and the packing tape had small dancing animals on it.
How could you NOT want to live there?

Today's Spotlight is dedicated to all things Japanese on Etsy...

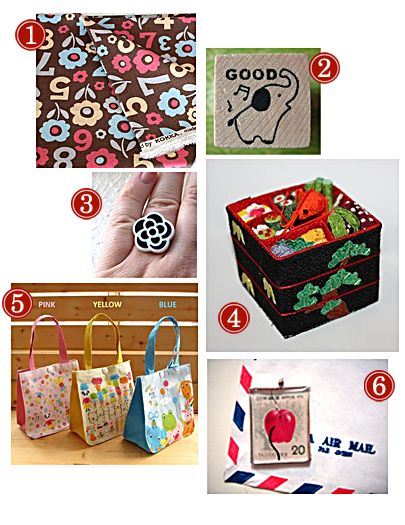
1. Brown Numbers with Flowers Fabric by Cotton Blue - $3.50

2. Cute Elephant Stamp by Jeana - $3.50

3. Funky Japanese Flower Ring by Sou Zou's Creations- $7.00

4. Handmade Playtime Bento Box by Cocoroya - $19.00

5. Rub Dub Dub Japan Lunch Bag by Boqinana - $6.00

6. Japanese Postage Stamp Pendant by guizi - $8.50

Which is YOUR favorite?

Shuttefly Photo Books

3.10.2010

There is something to be said about making a project and have it completely finished and bound in one sitting. I have had a love affair with bound digital scrapbooks for a few years. And the good news is, you can make these scrapbooks with a drop in template and it will take under an hour AND if you sign up for a Shutterfly Account you will periodically get coupon codes fro FREE 8x8" Photobooks.

I ordered this book today. I used this drop in template by Paislee Press called Defined Baby Quick Album in Pink.


The finished book will be hardback and after my promotion code cost me a whopping $8.47 for shipping. Oh yeah! That's a deal!
I made a photobook from Shutterfly once before and my children look through it the MOST of any other scrapbook I have ever made. Maybe because it feels like a real book. You can find drop in templates in many themes and styles.

Have you ever made a photobook at a photo site?
If so, did you like the finished product?

Flea Market Finds

3.08.2010

There's nothing like a flea market.
Especially if you're a crafter.
I recently found this book, brand new for $5.00
Score!

Craft Book Review: Sew Darn Cute

3.07.2010

Sew Darn Cute: 30 Sweet & Simple Projects to Sew & Embellish
by Jenny Ryan
★ ★ ☆ ☆ ☆

I was really disappointed with this book.

Although it was filled with beautiful photographs and cute design ideas, the designs themselves were so totally elementary that I am pretty sure you could google and find a free pattern for everything featured. For example, sewing coasters? It's 2 pieces of square fabric sewn together and then top-stitched.

Perhaps a VERY new and beginner level seamstress might like this, or a very young teenager, but to have an entire page dedicated to cutting a letter out of fabric and sewing it onto a white tee shirt seemed like a cop out.

The cute little sewing kit (as pictured on the book's cover) was something I would make, but it is definitely not worth purchasing this entire book.

Have you read this book? If so, did you like it?

Saturday Spotlight

3.06.2010

Seriously, did you SEE this amazing project from this week's entries of the online craft competition, So You Think You're Crafty?


It's a used suitcase that has been transformed into a dinosaur playland that can close and be stored away. FULL INSTRUCTIONS CAN BE FOUND HERE.

I don't know who made it (it stays secret until voting closes) but whoever did is a genius!
Now, if only we had a little boy so I could make one!
I'm not trying to be sexist...my girls are just NOT INTERESTED.
I've tried.

Maybe I could whip up a Barbie version....
hmmmmmmm.

Tutorial: Digital Scrapbooking 101

3.03.2010

I received a few emails after posting my digital scrapbook pages this past week. You all want to know the ins and outs of digital scrapbooking. Well, you're in luck. Here's an article I wrote for The Scrap Review last year that explains it all. Feel free to ask additional questions in the comments if you have them.

. . . . . . . . . . . . . . . . . . . . . . . . . . . . . . . . . . . . . .
.
How do I get started? You will obviously need a few tools to begin.
- A photo editing program: Adobe Photoshop, Adobe Photoshop Elements, Digital Scrapbook Artist, Microsoft Digital Image Pro, Corel Draw or any kind of program that supports .png files & layers.
- At least 256 MB RAM on your computer operating system. (obviously the more the better)

Is digital scrapbooking cheaper than traditional scrapbooking? In short. Yes. There is sometimes an immediate large investment because of purchasing software. But digital elements are usually cheaper than traditional, can be used as many times as you like and there are always endless freebies you can find. And yes, there ARE good freebies out there. More on that later. 12x12" prints cost around $3 to print.

What are the benefits of digital scrapbooking?- Inexpensive.
- No mess.
- You can alter digital elements to any color you would like to match any theme and stretch your purchased supplies even more.
- You can continue to switch elements until your layout is just right.
- It is much faster than traditional scrapping.

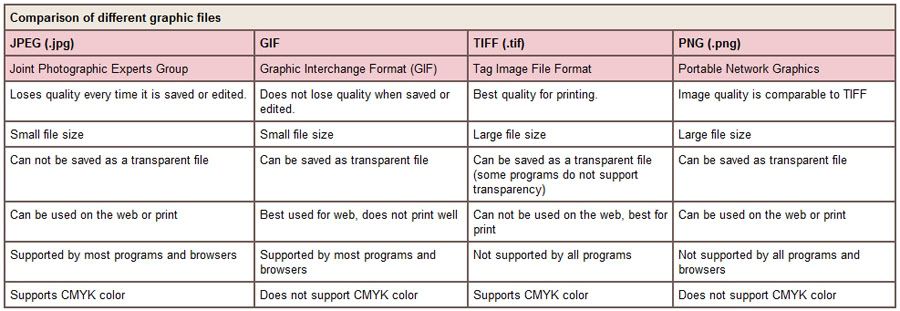
How do I save my finished pages? You should save your file as a layered file first (psd file for Photoshop or psp file for Paint Shop Pro). You may need to edit your scrapbook page later so saving it in layers allows for that. Once you have your file saved, you need to find out what format is best for the printing method you will be using. If you are uploading your file to a photo lab, you will want to save it in a JPEG format. If you are printing from home you can use whichever format is compatible with your printer. JPEGs or pdfs are great for printing at home. You will need to see which file format your print shop prefers if you are uploading it to be printed professionally but TIFF files are the standard file format used in the printing industry.


(Table courtesy of justmommies.com ) Click to Enlarge


Where can I print my finished digital pages?
- Photo Labs: Many traditional photo labs now offer 12x12" prints for an affordable price. You can either put them in albums as is or add additional embellishments for a hybrid project. here are a few of the least expensive options.

Costco $2.99
Sams $3.56
Kinko's They will print your 12" layouts as 11" layouts on 11" x 17" archival paper for about $2. Just trim off the white edge, and mount on 12” x 12” cardstock for a wonderful, layered layout. They will print standard 8.5" x 11" layouts for under $1.


- At Home: If you have a large format printer or a standard size printer that can print to the edge of the paper, you can print your layouts from home. This is convenient, but takes a lot of ink.

- Online: There are many online resources for printing your digital layouts and having them mailed straight to your door. There are many online, but here are just a couple I found through a google search.

scrapbooksplease.com - starting at $0.74
scrappingsimply.com - $1.99


What about prinitng a photobook? There are also many online services which allow you to create an entire photobook and print it. They will then send you the completed book, bound to your specifications. These sites offer softbound, hardbound, leather covers...the works! But not all photobooks are created equal. Three popular photobook sites and my take:
My Publisher - Photobooks range from $10 and up. I made the mistake of ordering the $10 soft cover photobook once as Grandparent gifts for Christmas. They all disintegrated within about 10 days. Pages fell out, staples ripped through papers...you get the picture. I have never tried a hardback from this company based on my soft cover experience, so I cannot comment on their quality. http://www.mypublisher.com/

Apple iBooks - For you MAC users this is the go to resourse for creating your photobooks. The uploading system is easy to manage and completely customizable. The quality of the finished hardbound books are fabulous. I highly recommend this resource.

Shutterfly - In my opinion this is the best photobook printing site. They offer tons of options, including their premade templates as well as many templates designed exclusively for them by CK designers like Ali Edwards and Jessica Sprague. You can also easily upload you finished album pages without using their formats at all. Prices range from and the quality of their hardbound books is excellent. This is our TSR Top Pick for online album printing. http://www.shutterfly.com/

Where do I find high quality Digital Freebies?

For real...with a bit of searching you could digi scrap with freebies forever and never need to buy a thing. My favorite source by far is Designer Digitals. Each week they usually have 3 different freebies and they are quality freebies designed by Katie Pertiet, Ali Edwards and other talented artists. Here is a sampling of what is available for freebie download in the forum right now....but they have much more than this.


I downloaded this freebie paper kit by Mindy Terasawa from DesignerDigitals.com.


Oscraps.com also has an amazing selection of quality freebies. Here's a favorite I found last night. Crazy Beautiful by Fei-Fei's Stuff. (I will be using the paper photo frame for today's project)


and Compulsive Entitlement by Taylor Made Designs from oscraps.com.


And I made this layout using ONLY these freebies in NO TIME at all! Probably less than 30 mintues.


There are so many digital kits and sites. How do I find products that fit MY style? Some of you mentioned you have a hard time finding your style of digital scrapbook kit. As you digital scrapbook more often, you will start to know who makes your style of digital kits, just as you know now which paper manufacturer makes your style of paper products and embellishments.

Here are three sites I like...they each have a good variety of designers and styles and are easy to navigate. They all also have freebie sections, but you have to register first (it's free) to be able to see and access the freebies.

http://www.oscraps.com/
http://www.designerdigitals.com/
http://www.scrapartist.com/

Here's a quick little overview of a variety of styles out there in the digital scrapbooking world.

Sleek and Sophisiticated: Paislee Press Designs, Leiko Beck Designs
Bright and Whimsical: Emily Merritt
Fun and Colorful: Be Audacious Designs
Vintage: Miss Crow's Magickal Emporium
Ultra Feminine: Fei Fei's Stuff
Queen of Cool Templates: Kellie Mize
Designers You Already Know: Ali Edwards, Jenni Bowlin Studios

I really hope that answered many of your questions about the basics of digital scrapbooking. Please leave comments with any other questions you have about digital scrapping here and we will address them when we can.

Digital Scrapbooking with "Everyday, Ordinary" kit

3.01.2010

I used to scrapbook professionally, creating pages from paper and products given to me by magazines and manufacturers. I quit last year when the pressure had made me realize I just wasn't enjoying it anymore. I resigned from many teams, but one stayed.

Paislee Press Digital. Most paper scrapbookers turn their noses up at digital, and I did too until I saw products by Paislee Press and I fell in love.

And now, years later, I am still in love.
Paislee Press is releasing a new Collaborative Kit today at oscraps.com called Everyday, Ordinary. I adore it, especially with my newly found love affair with Mustard Yellow.

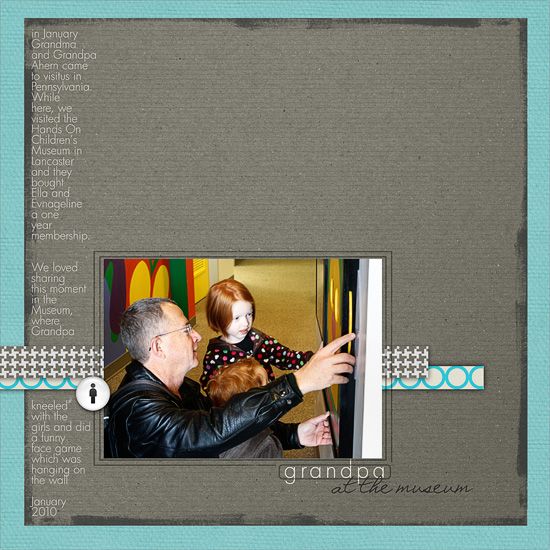
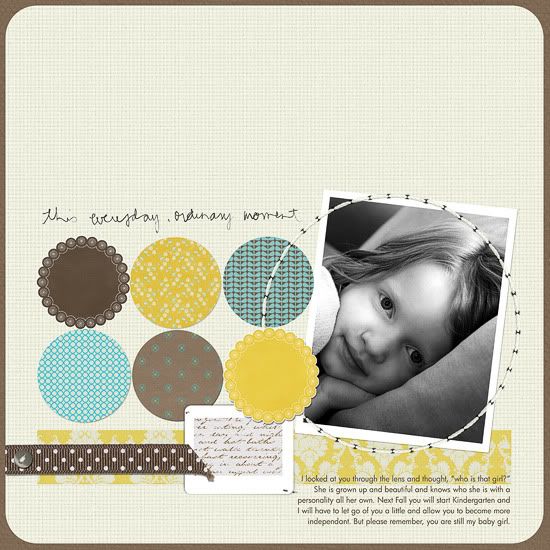
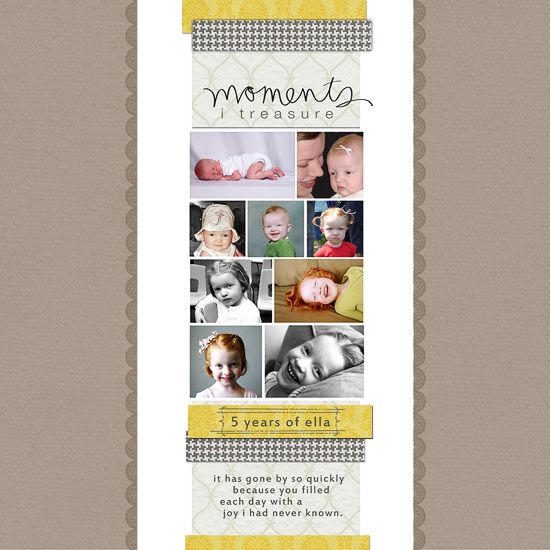
Here are three layouts I made using the kit.
Purchase the kit by clicking here.