


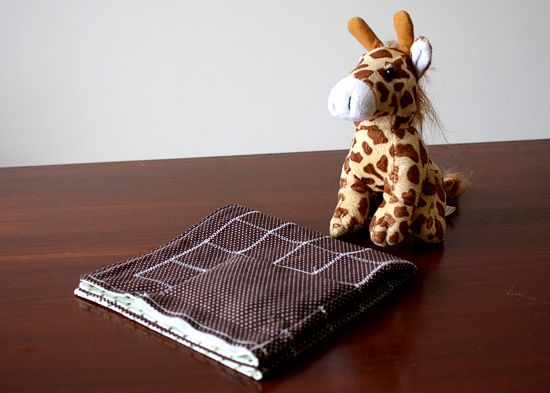
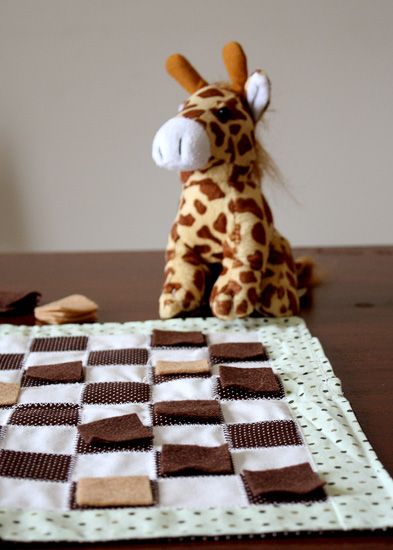
The finished product is this fabric On-The-Go Checker Game.
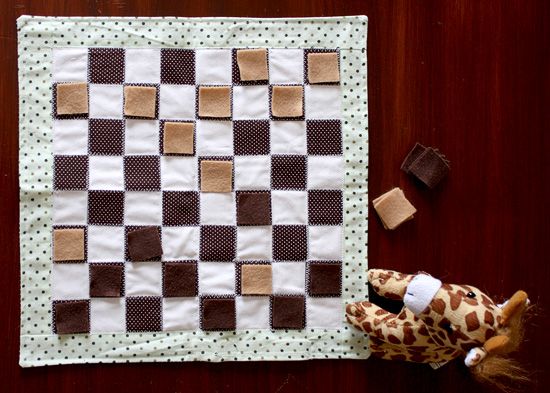
The best part is I used only scraps from my fabric stash to create it...no cost and it took about an hour to sew start to finish.
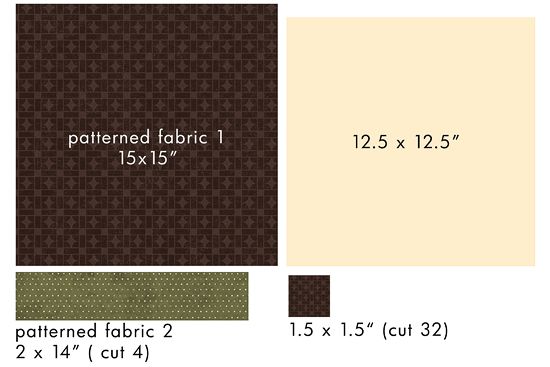
*All sewing seams are 1/4". Finished dimmensions: 14" square

- 1/2 yard cream or white fabric (this could be 100% cotton or flannel)
- 1/2 yard patterned fabric #1 (small scale)
- 1/8 yard patterned fabric #2 (small scale)
- 4.5" strip velcro or 3-4 velcro dots
- 2 sheets of craft felt (one in each of two different colors)
- 1 sheet double sided fusible webbing (I used this product.)
- iron and ironing board
- sewing machine
- white thread and bobbin

1. Cut fabric to the measurements picture below
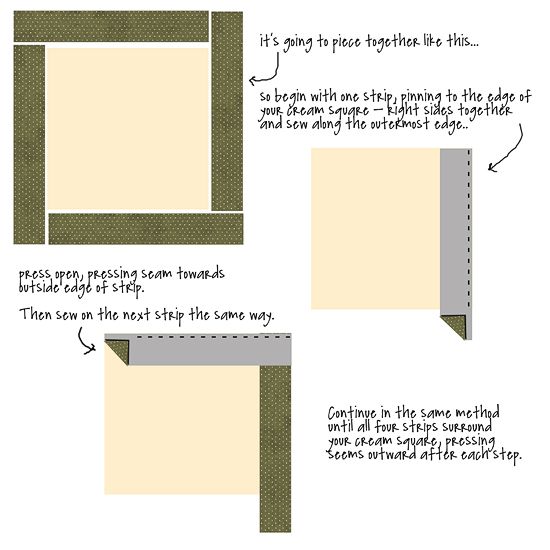
2. Sew patterned fabric strips around the edges of your cream square.
4. Lay your sewn square on your ironing board. peel off paper backing of each square and arrange on cream square in checkerboard pattern.
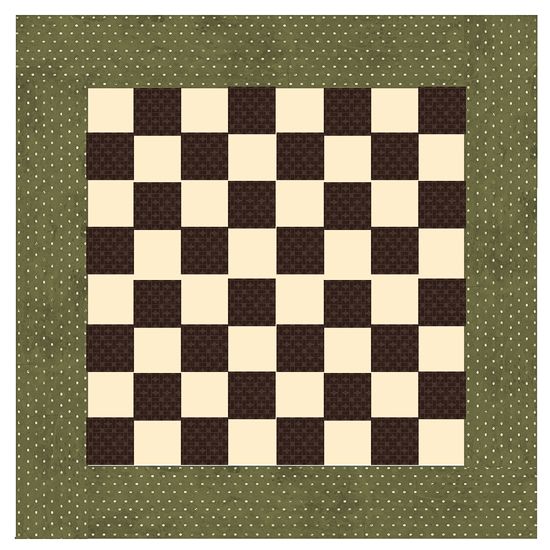
5. Use iron to adhere squares to cream square using directions on packaging for your chosen fabric.
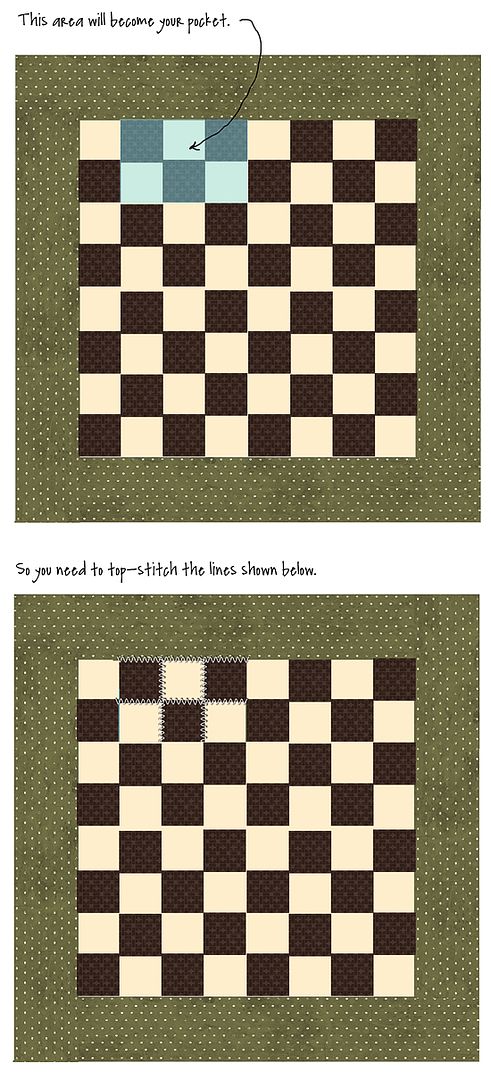
6. Now, if your slightly obsessive compulsive, like me, you'll want to section off the area that will become your pocket and top stitch on it before sewing the front and back piece together. Otherwise all of the rest of the playing board will have identical top stitching except that portion. Mark with pins the squares that will become the top layer of your pocket and top stitch them with a zig-zag stitch.
9. Sew loop side of the velcro into inside opening of the pocket. Sew hook side of velcro into opposite inside of pocket opening.
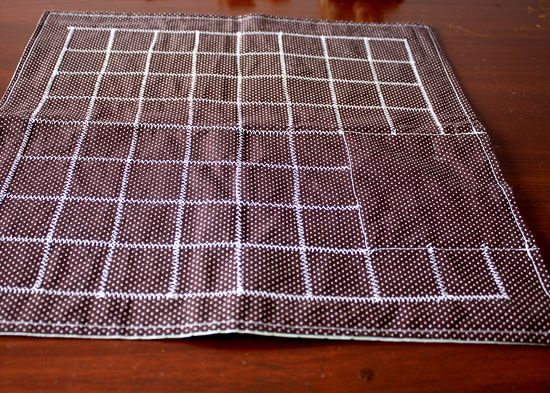
10. Top stitch around outside edge of checkerboard with straight stitch.
11. Top stitch all lined of checkerboard. The back will look like this (except the pocket edges of yours will have a zig-zag stitch.
12. Cut felt into 1&1/4" squares. Cut 14 squares of each color. You actually only need 12 of each color, but I cut 2 extra of each color checker in case some got lost.

13. Store felt checkers in pocket.
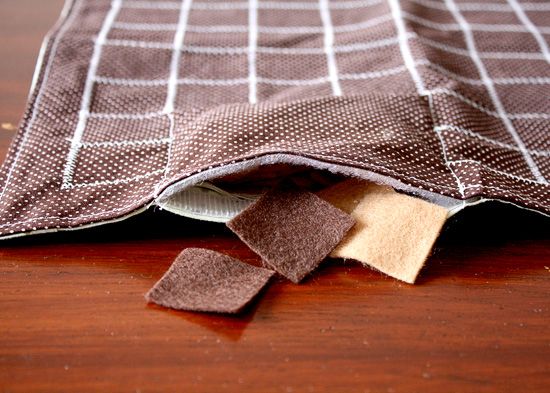
You're finished! This can be folded in half and half again and stored in your purse, the car or your child's backpack. And because the checkers are made of felt, they stick slightly to the fabric, making it wind-free and slip proof.
One more note: When someone has his/her checked "kinged", simply put two square checkers on top of each other with one at a 45* angle to the other. This will create a star silhouette which will distinguish it from other "non-kinged" checkers.
Enjoy and HAPPY NEW YEAR!


5 comments:
( YAY! im the first to comment on your first ever craft blog entry!)
I love this project, thanks for the instructions and inspiration beautiful!
The POCKET is genius!
I love that it's completely contained.
a.maze.ing.
girl, you are awesome.
Very clever design. I'll be posting on Facebook. Thanks for sharing.
this is fantastic! If my kids ever get into checkers, I know where to come!
Post a Comment