


(Click to Enlarge)
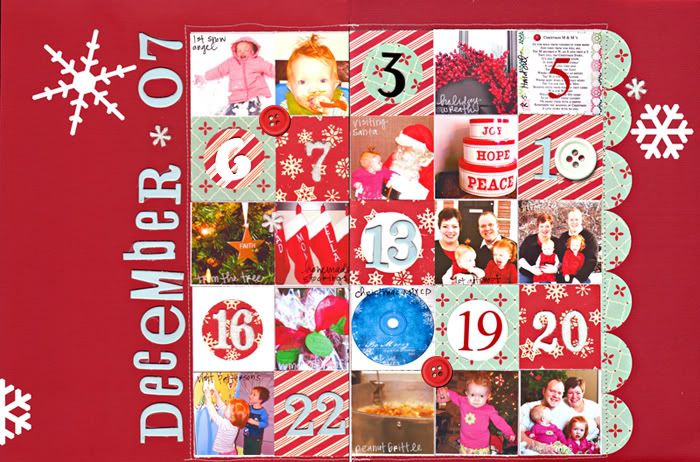
This tutorial adapts the December Daily Album that Ali Edwards does each year (isn't she a genius?) and making it a bit smaller and easier to chew. I tried her idea last year and failed miserably...so this year, try an easy-peesy version that can be completed in less than one hour....yes, you heard me right....less than one hour.This project can be either 8.5x11 or 12x12* depending on your preference.

- 2 pieces 8.5x11 red cardstock or 1 piece 12x12" red cardstock
- 2 pieces white cardstock
- Your favorite Chipboard Alpha
- Marvy Circle 1.5" circle punch
- Good Cheer line by October Afternoon
- 2 or 3 red and green buttons
- assortment of all of your leftover numbers from stickers/chipboard alphas
- Heidi Swapp Snowflake Ghost Shapes or diecut paper snowflakes
- White and black photo pen.
- Paper Trimmer
- Sewing machine (optional)
Downloadable template for calendar base. Click here to download for FREE!
(Yeah, I'm cool like that.)

- Open template using Microsoft Word. Print calendar template onto white cardstock. Trim around edges of grid.

- Adhere to layout lining inside edges straight along edge of red cardstock.

- Use a 1.5" circle punch to punch 4-5 circles of patterend paper.

- Use a trimmer to cut cricles in half.

- Line half circles along right edge of white grid to form scalloped edge. Adhere to layout.

- Sew a straight line stich around edge of your grid, going directly over your scalloped edge as well.

- Use white, red, green or other coordinating chipboard alphabet to write December 2008 along left side of white grid.

- Using a 2" square punch or trimmer to cut squares of multiple patterend papers from your hoilday paper line. Punch a few with your circle punch as well.

- Set these small papers aside in an envelope. Store with other supplies.
Throughout the month of Decemeber do the following...
- Take photos and keep a record of activities done on each day of the month (if you don't write it down, you will forget). Don't worry if you miss a day, you'll want to have a number of empty spaces on your grid by the end. You may choose to only include holiday themed activities or document all occurance throught the month of December.
When you're ready to assemble your page...
- Pull out stored supplies. Print out photos from month of december.

- Choose which photos and memories you would like to display on your layout. Trim photos to 2" squares.
- Place photos on white grid on appropriate dates first. Use a white or black pen to write short descriptions of photos directly on the photo.

- You should have some empty squares leftover. Place punched squares of patterned paper on empty grid spaces. Making sure you use a random mix. Add some circles of patterned paper to the middle of a few of your squares.
- Take any coordinating chipboard or sticker numbers and lable date numbers on free squares.

- Add a few colored buttons to corners to break up and soften grid lines.
- Add Ghost or paper Snow Flakes to "white space" of layout edges.
*To adapt this layout to a one page, 12x12" layout, print the grid to the same size and configure your layout like the example below.

Hope you love this idea and that you can use this simple project to document a frenzied month that means so much to your family. This same layout could be easily adapted to Hannukah or other alternative holidays besides Christmas.


1 comment:
I did this! And finally scrapped it!
http://www.scrapbook.com/galleries/188059/view/2647851/-1/1.html
Thanks for the inspiration!
Post a Comment