


Julia child said,
"With enough butter, anything is good.”
And I heartily agree.
Here's a simple and fun activity to do with kids this Summer. Kids really love seeing this process go from start to finish and the taste of the butter? Well, you just haven't lived until you have had butter this fresh. It's divine, people. Divine.
A quick note about the nickle in the jar. It acts as a churn, creating resistance with each shake. It is, indeed, optional. However, without it you are more than doubling your jar shaking time. And that's a lot when we're talking about 10 minutes verses 30 minutes when small kids are involved. You'll notice I boil and then wash the nickel. I feel like that's pretty darn clean, but you can always shake away without it if you are concerned.


- 1 small baby food jar for each child
- 1 nickle for each child (optional)
- heavy whipping cream
- salt
- thin kitchen towel/cheese cloth

1. Wash a small empty baby food jar out with soapy water. Rinse well and fill it halfway with warm water.- 1 nickle for each child (optional)
- heavy whipping cream
- salt
- thin kitchen towel/cheese cloth
2. Place nickle(s) into jar and microwave on high for 3 minutes. (the metal does not spark, not sure why, but it doesn't). Make sure water comes to a full boil and stays there for at least two minutes. Remove from microwave with oven mitts.
![]()

3. When cool enough to handle remove nickel and clean jar and nickel thoroughly with dish soap. Rinse well and dry with paper towels.
4. Fill each baby food jar about half way to the top with heavy cream, add a pinch of salt. Add nickel and put the lid on securely.


5. Shake the jar for about 5 to 10 minutes. Make sure the top is properly closed as it could leak. Around five minutes you should notice the cream coating the jar.

6. In about 5-10 more minutes you'll notice a large lump of butter has formed.
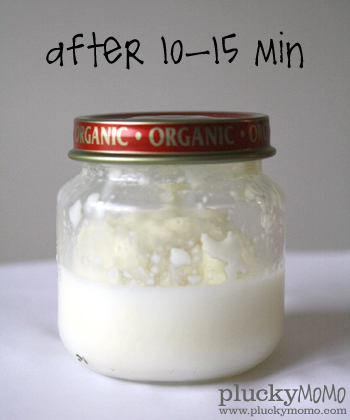
Here's the clump of butter solids in the center and watery liquid around the sides. Bonus: that watery liquid is pure, bonafied Buttermilk. Use it to make pancakes tomorrow morning.

7. Scoop the butter out of the jar with a butter knife, and place it inside a clean kitchen towel or cheesecloth. You may squeeze gently. This extracts all of the left over liquid and leaves you only with the solid butter.

9. Scrape from towel into a small dish. Place in fridge for 10-15 minutes to firm up if desired.

10. Spread onto toast or other bread item and enjoy!

Yield: One small baby jar filled half way makes a finished yield of about 1 Tablespoon of butter. You can have multiple family members participate with small jars if you want a higher yield or you may use a larger jar. You could use a pint canning jar, but add more nickles and more salt before shaking. Just always fill you vessel only half way full.
P.S. I did this with the girls with the larger size baby jars and it took the same amount of time. 10-15 minutes total.
P.P.S. Linking up to Skip to my Lou
[ emilie ]


5 comments:
Yum! And love your new site!
I love this idea of making your own butter.
I am linking to it on my blog
www.isavvymom.com
Nisrine
I'm so... trying this! And then, I'm adding a little cinnamon to my butter. Voila! Perfect toast butter!
As always, thanks Emilie!
So yummy. If you don't have the arm strength to shake that long, you can do it in the food processor too.
I'm trying this at my sister's this weekend! Can't wait!
Post a Comment