This is by far my favorite Photoshop tool. Photography is a tricky science that depends largely on light. You almost always want to shoot in natural light, but the truth is, our lives often happen indoors in unnatural lighting. Here is a picture from our Thanksgiving. There was no natural light coming from the windows, so the main source of lighting was this chandelier with yellow cast bulbs. Using a flash would create odd shadows, blown out faces and red eye. But taken with the flash off and with this Photoshop trick it can be made right.
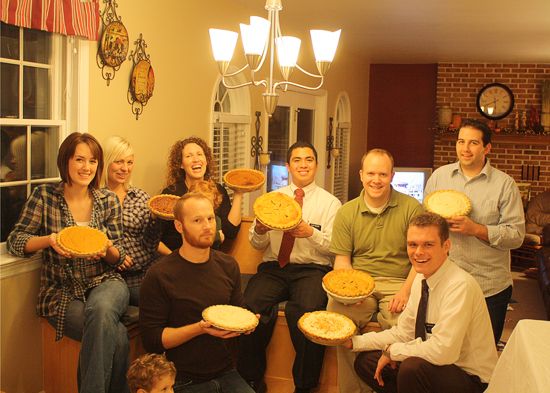
Pretty yellowed and dingy, huh? No worries! First, open up your photo in Photoshop.
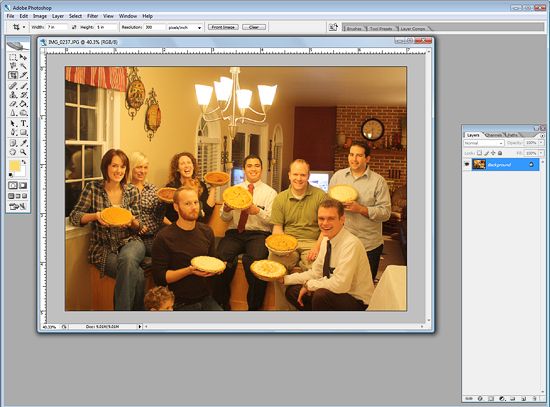
Now hit Ctrl+L to open the Levels Tool. Click on the eyedropper tool on the far right that is white.
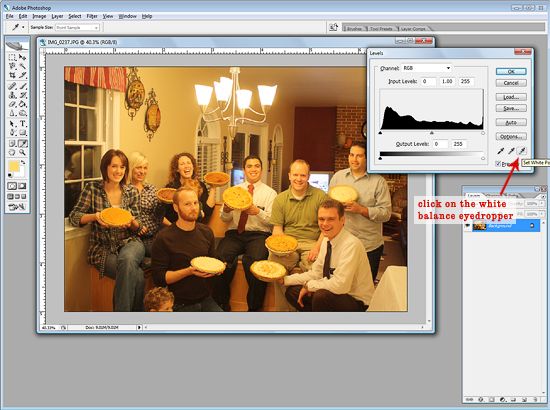
Make sure the Preview box is checked. Now click on an area of your photo that SHOULD be pure white. This may take a few clicks on different white spot to find the one that best corrects your image.
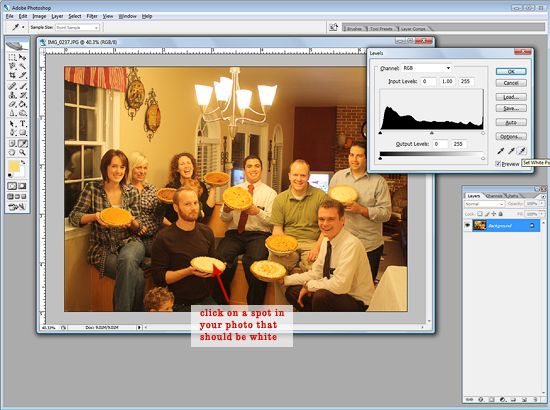
Play around, nothing is permanent. If you get completely off track just hit cancel and try again.
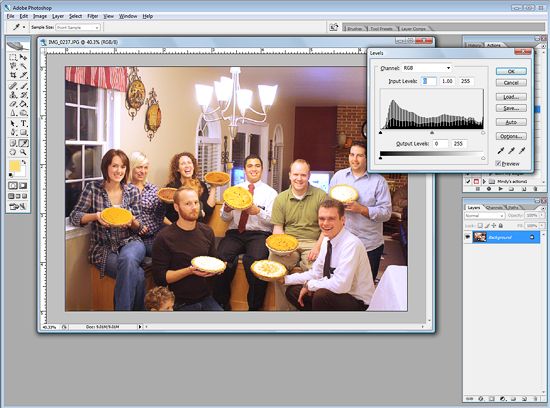
Sometimes the tint is corrected, but this process slightly washes out your photo. No worries. In the Levels toolbox click and drag on the black arrow and slide it towards the center until you have achieved a look you like.
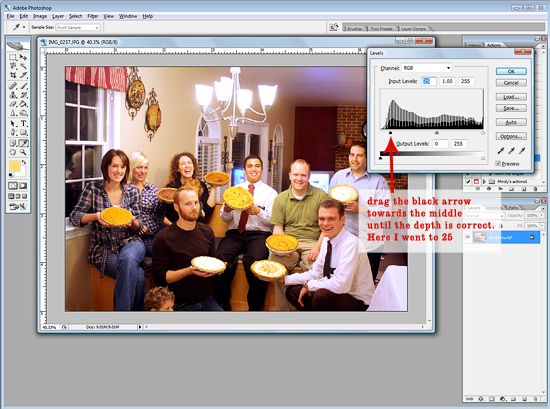
There! You're done! Let's look at the fixed photo...
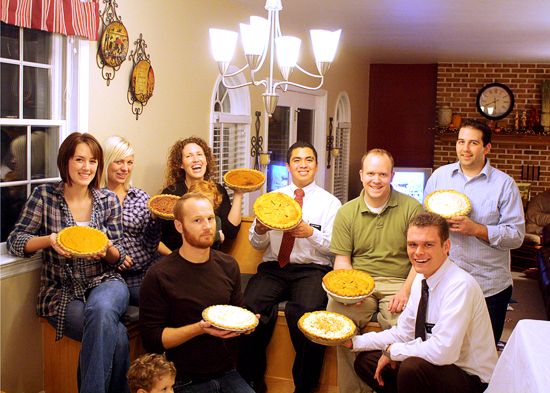
This trick is especially great for photos of little ones at bath time. Bathrooms often have yucky yellow lighting and limited windows. This tool makes your bath time photos bright and fresh! This is also great for correcting the tint of vintage photos with an odd cast or that weirdly pink glow some of my baby photos had.
Now go forth and color correct! Enjoy!


2 comments:
VERY cool! Thanks for sharing. I love playing around in PS. One of these days, I may be a Pro! ;-)
Thank you so much for this!!! Fabulous tutorial! :)
Post a Comment